Tuesday, February 25, 2014

Landon's Baptism

My son was baptized a member of the Church of Jesus Christ of Latter Day Saints on Saturday.  In our church, we do this at age 8.   Almost every emotion I could possibly have was present that day.  
1.  Happy - because of the decision my son had made to be baptized.
2.  Sad - My son is getting too big!
3.  Stressed - There was a lot to prepare for this day!
4.  Uplifted - The program went well.  There were great speakers and lovely music.  I felt the spirit and I hope my son did too!
5.  Loved - Lots of people came to show their love and support for us.
6.  Pleased - Everything from the program to the dinner afterward went relatively smoothly.
7.  Relieved - All the planning, preparing and work was over!
8.  Beat - It was a big day and I was tired!  

I am so proud of my son and I hope he had a special day.  I know that his decision to be baptized will bring him joy all throughout his life.  I hope he continues to live righteously and make good decisions.  I also hope that he learns to recognize the Holy Ghost in his life.  What a precious gift he was given on Saturday.  

We had a celebration afterwards at our house.  Here are a few things I did to decorate for the party.

I filled up our apothecary jars with things that help our guests get to know Landon a little better.  He has always loved Hot Wheels.  The other jar is filled with Legos.  And just look at that handsome little bugger...   


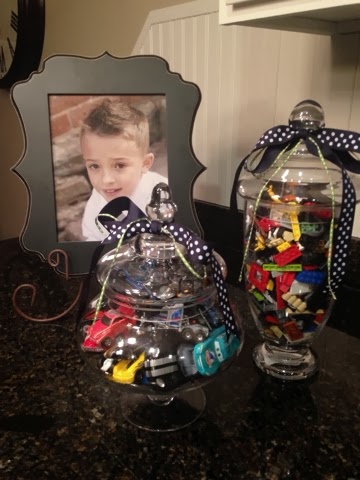
I gathered my favorite pictures of him and hung them up on a photo garland.  I used tiny, white clothespins found at Hobby Lobby to hang the pictures on the twine.  


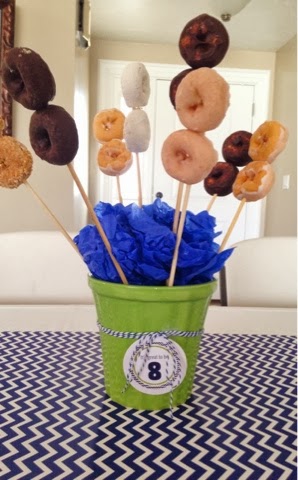
I covered our tables with white tablecloths, and had a blue-and-white chevron table runner.  The table runners are made out of....wrapping paper!!  I found the wrapping paper at Tai Pan for about $4 a roll.  The wrapping paper is that good quality kind that is heavy and thick.  I also bought the pots at Tai Pan and stuffed them with floral foam.  I then poked two doughnuts on each skewer (to make an "8") and arranged them in the pot.  I stuffed some tissue paper in the pot to cover the floral foam.  I finished the centerpiece off with a bit of blue-and-white twine and an "It's Great to Be 8" tag.  


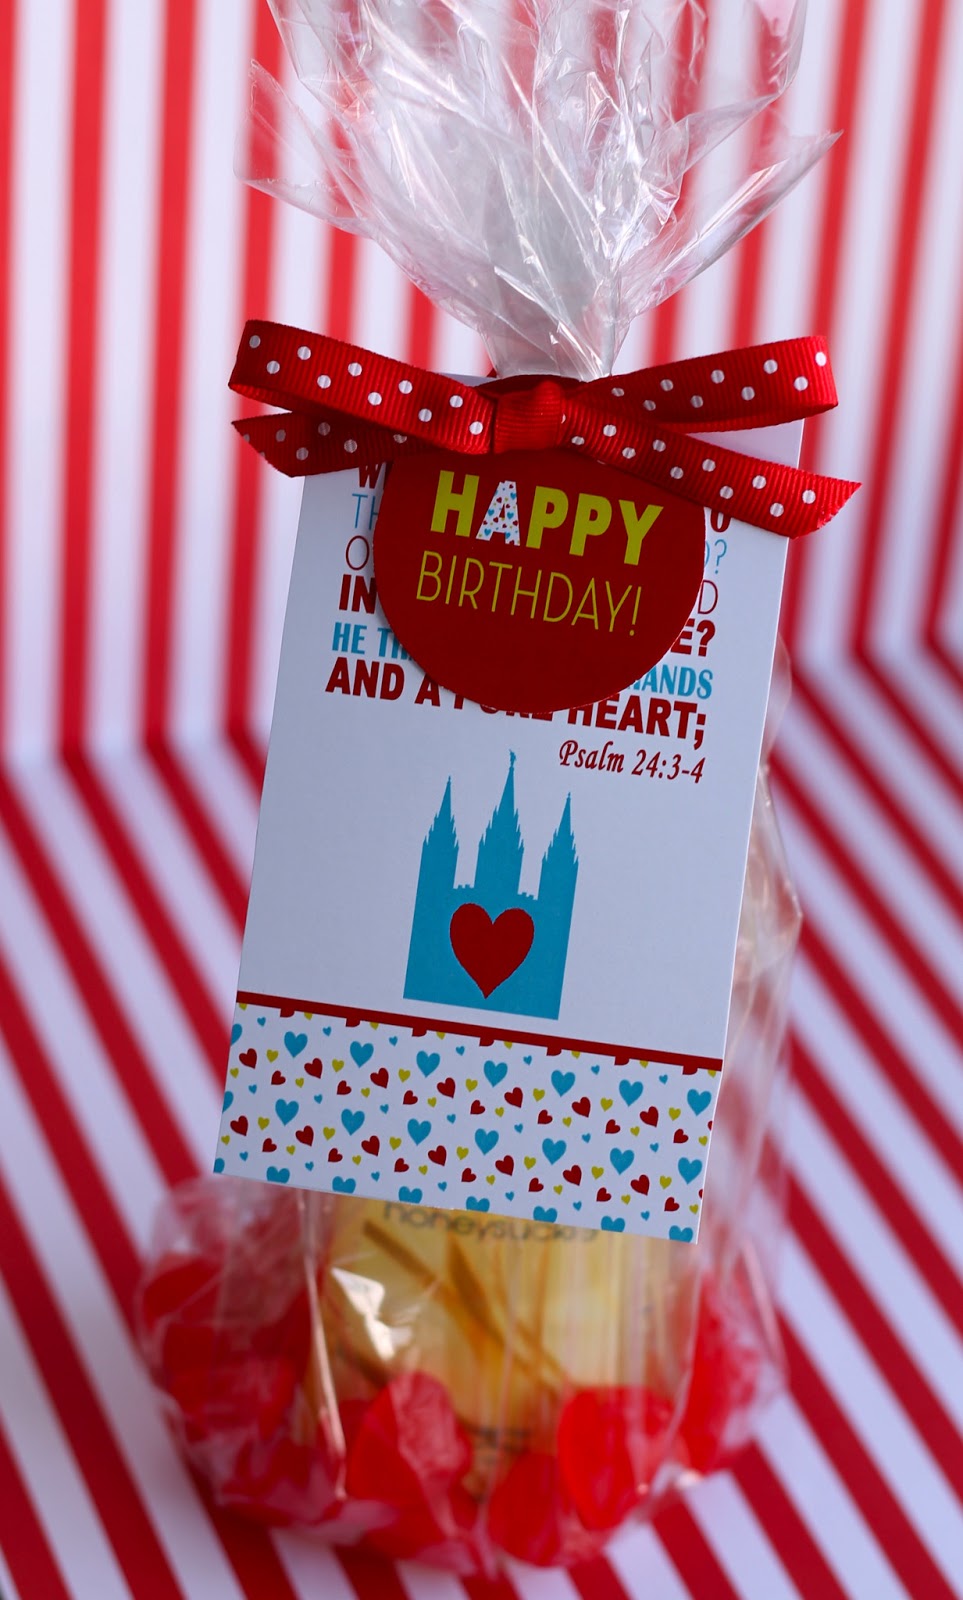
The last detail I didn't get a picture of!!  I was SO busy entertaining guests that I didn't think about it! We served a dinner of deli sandwiches, salads and chips and had a two-tiered stand with some of Landon's favorite desserts.  In each brownie, I stuck a cupcake topper.  In this case, it was a brownie topper.   I wanted to share this pretty printable with you!


I cut out each circle with a 2 in. circle punch.  Then to assemble one, I found two of the same design, used a little double-sided tape on each circle, centered a sucker stick in the middle of one circle, then sandwiched the stick by covering it with the second circle, making sure the edges of both circles matched up.  So, it look something like a sucker, just make out of paper. ;)  Make sense?  I hope so!  I wish I would have taken some pictures!!

Here is the link to download the circles.  I had mine printed at a professional print shop because I wanted the colors to be vivid and bright.  My home printer just doesn't do that.  I printed them on regular paper, not card stock.  Though, I think you could do either one.  
It was a special day and I hope my son loved it and will remember it always!


Tuesday, February 11, 2014

Valentine, You Make My Heart SOAR!

Here is a super cute and fun Valentine idea for you!  I made this for my son who wanted to give out gliders to his class for Valentine's.  So, I bought a box of 72 gliders for about $8 from Amazon (a bit overkill considering his class has 24 in it, but I know we will end up using all of them in the future!)  Then, I created this tag to go with it.  My son is super happy with the results, I had a great time making them and I know his class will love them.  Here is how you assemble these Valentine's...

1.  Print image.  It can be on either regular paper or card stock.  I printed on regular paper to keep the cost down, but it looks nicer on card stock.  You can fit 6 Valentines on one 8 1/2 x 11 sheet of paper.
2.  Cut out the Valentine.
3.  Fold in half
4.  Insert the glider in folded Valentine so that the top of the bag reaches all the way to the fold.  Make sure that it is centered.
5.  Staple on the middle-top and the middle of both sides.
6.  Personalize.

Happy Valentine's Day!


Right click and save image.  You can resize it it to fit your package.  I used 3 in. x 3 in.  dimensions.


Monday, May 13, 2013

A Little Bag of Sunshine

I know two people right now that could use some cheering up.  Most of the time, when I learn about somebody who is having a rough time I think, "I should do something for them!" and then I can't think of anything to do, and lots of time goes by and I end up doing nothing...and then I feel bad.  Well, now, thanks to Pinterest, I always have something in mind that I can do to help brighten someone's day.  I have seen this idea and all it's variations pinned over and over, so I don't know who to give credit to.  This is my own version.  I filled a bright yellow bag with yellow items like, yellow nail polish, Swedish Fish, yellow taffy and yellow gum.  Then I added a yellow bow and topped it off with my cute, sunshiney printable that I had printed on card stock.  I really hope this gift helps brighten my friend's day! 

Feel free to download this printable and brighten someone's day!


Tuesday, February 26, 2013

Lucky You!

We have a naughty little leprechaun visit us every St. Patrick's Day and I suspect this year will be no different.  We don't know his name because he has never had the manners to tell us what it is.   So, we lovingly call him Larry because "Larry the Leprechaun" rolls off the tongue nicely, don't you think?  

The little stinker sneaks into the house, finds the kid's rooms and messes them up.  Clothes and underwear are pulled out of drawers and strewn on the floor and hung in odd places, toys out of place, and the beds unmade.   The only good quality that we can find in this little guy is that he leaves a sweet treat in an adorable box that resembles a black pot o' gold under a rainbow. 

The kids love this tradition and really look forward to their visit from Larry the Leprechaun.  I love this tradition because it's simple, easy and, well, I love messing up their rooms!  I am always cleaning them, so change is good!    Hope you enjoy it too!
 
Tools Needed
scissors
ruler
butter knife
double sided tape 

Instructions
1.  Print the shapes on heavy card stock at a professional print shop. 
2.  Cut out the shapes.
3.  Gently score the fold lines on the colored side of the box shape using the dull side of a butter knife and a ruler to keep your scoring straight!
4.  Fold the long side of the shape up into a square (white sides on the inside).  
4.  Tape the tab (on the colored side) with double-sided tape and press to the white wall of the box.
5.  Fold in and tape the remaining 3 tabs and press them to the white walls of the box.  
6.  Add a little strip of tape to each of the clouds and stick to the top of the box.


Saturday, January 19, 2013

Birthday Present idea for the Young Women

New year, new youth theme, new birthday presents for the Young Women!  The theme this year is “Stand ye in holy places, and be not moved” (D&C 87:8)." This year I wanted a gift that went along with the theme to remind them what the youth of the church are focusing on this year.  Well for some reason I couldn't think of just the right present!  Since about November of last year, I've thought about it, and thought about it, and thought about it.  I couldn't ever think of anything until recently so I am just NOW finishing up the birthday gifts for the year.  Good thing, because we're handing the first one out tomorrow!

I came across a scripture...Psalms 24: 3-4.

"Who shall ascend into the hill of the Lord? or who shall stand in his holy place?
 He that hath clean hands, and a pure heart; who hath not lifted up his soul unto vanity, nor sworn deceitfully."

Perfect!  So I hit the Bath and Body Works sale and got some hand soap, bought some Valentine hearts and finished it off with a bow and these awesome printable tags that I made...   
   
See how cute?  I hope my sweet young women love 'em!


Sunday, December 2, 2012

Handout of Manual 1 Lesson #46 The Purpose and Value of Education

Well hello there!  Here is a little handout for lesson #46, The Purpose and Value of Education.  It's a simple one this time, and it may or may not be because I ran out of color ink in my printer ;)  Enjoy!


Thursday, October 11, 2012

Halloween Pillowbox for Treats or Small Gifts

I don't know about you, but I am always scrambling to find gift wrap because I ALWAYS forget to pick it up at the store.  So usually, I search through my bag of gift bags, find the best gift bag that I can (which is usually a crumpled one that has been used and reused 20 times) manage to find some tissue paper that KIND of matches and hang my head in shame as I give my sad gift to my loved one.  So I can really appreciate the kind of gift wrap that I can print.  I don't need to store it, it doesn't get crumpled and it is so darn cute!

Here is my Halloween version of the Pillow Box.  Adorbs...
These are really easy to put together, just follow the steps here which will also take you to another version of my pillow boxes.

You can download this pillow box and the tag in a few different colors by clicking one of the links.  Enjoy!


Pretty Printables For You | Template By Rockaboo Designs | 2012